
In one of my high-end residential projects, I was cast with the challenge of fitting a printer into a pre-existing cabinet that the homeowner had in his library.
Although it may sound very simple and laughable, this is one of the most complex architectural mini-projects I’ve ever executed – simply because of how challenging it is to work in a microscopic environment of an existing cabinet, where every single detail matters.
The final solution that we installed is still not “perfect,” but it is more than adequate for our needs. After much testing design inspecting for this tiny little thing, we finally installed a solution that works.
For those people who are engaged in the same kind of problem, I wanted to write this article to illustrate the challenges installing a printer inside of cabinet.
Basic Design Concepts
The first thing you have to consider for a printer is whether it is built to slide out or not.
Many printers come with multi functional utility, which includes scanners, fax functions, amongst other things.
These functions all require certain amounts of space.
But if you’re just creating a basic printer It’s a little bit less complicated because he can adhere to the minimum spatial condition possible.
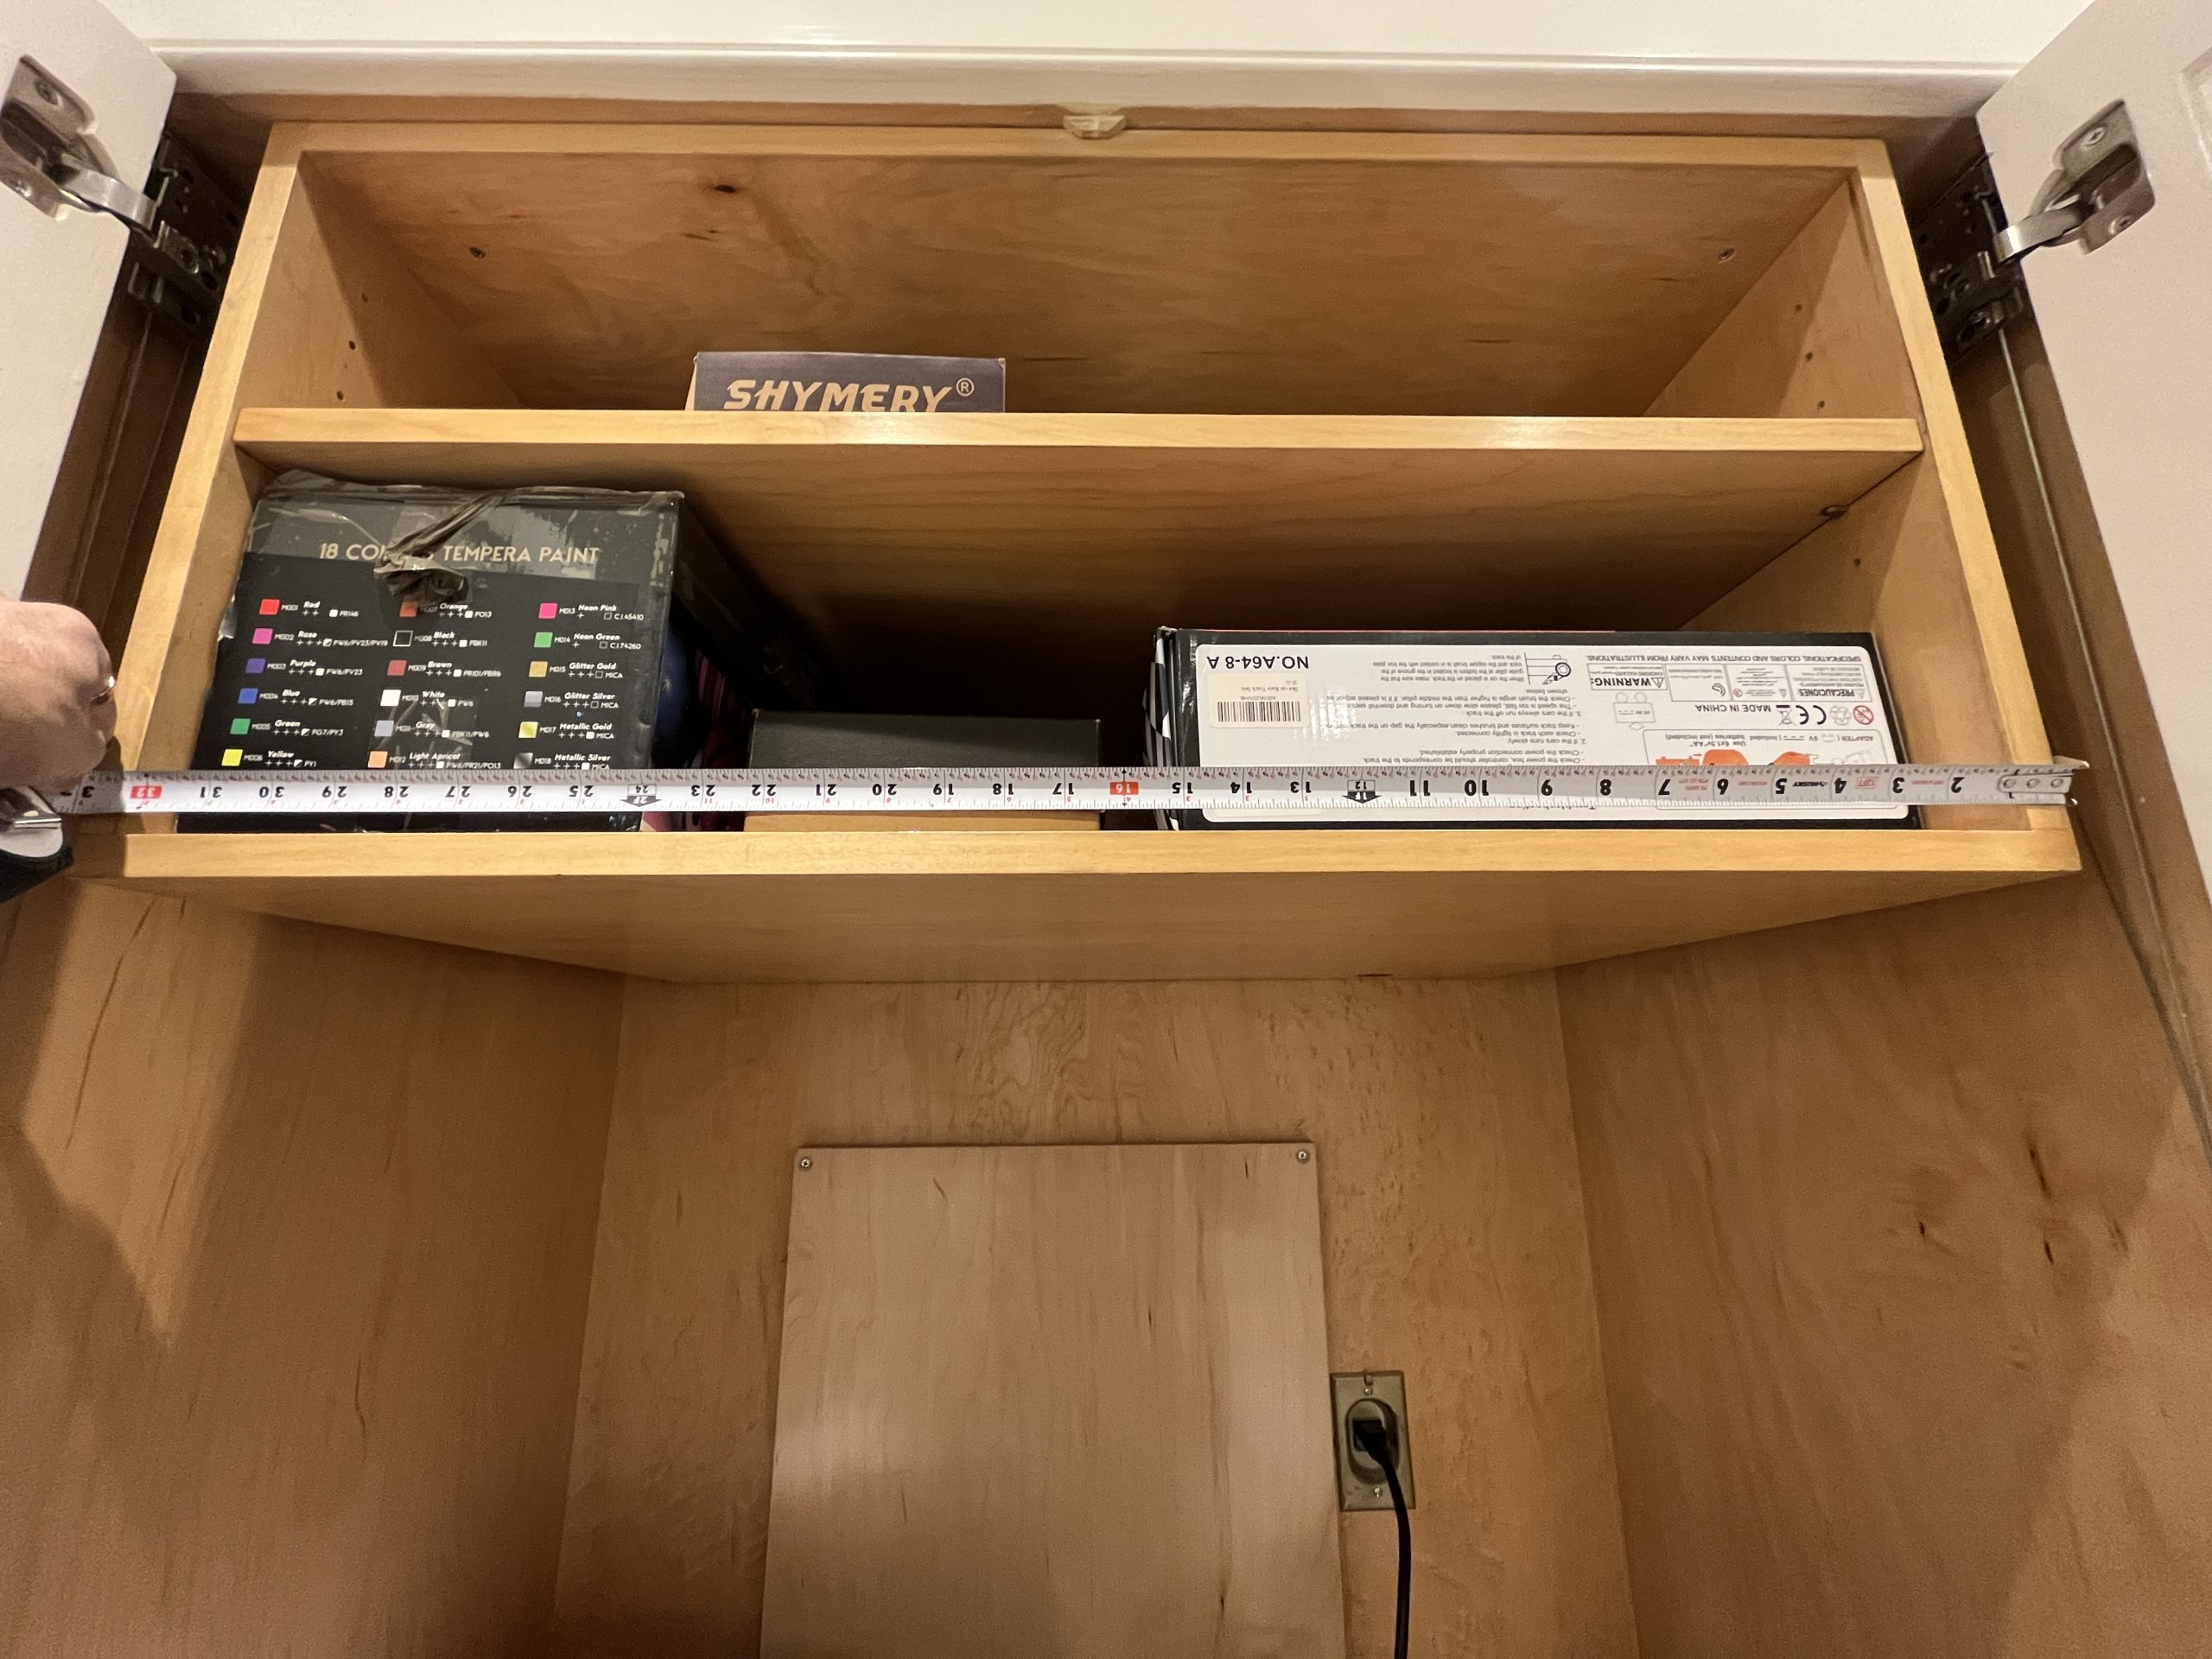
If you are designing a shelf for the printer that slides out, you also have to consider the glides, how the shelf actually pulls out, whether the glides lock in place or not, and also once the shelf slides back how much spacing there actually is for the wire management.
Power & Data In The Printer Cabinet
Beyond this, there’s also the question of where the power and data cables go both within the cabinet, and also how they connect into the printer, and also how the wire is managed afterwards.
In our situation we had to be a dual challenge.
On one hand of the cabinet opened Outwards on both hinges and the ideal angle for the client to access the printer while using his desk position the printer on the right side of the cabinet.
However, per the constructibility of the outlets required to feed the printer, which were a power outlet and a data outlet which were to be installed within the cabinet itself, we did not have enough space to install the outlets on the right side.
The brick behind the cabinet would face did not have enough clearance to allow the outlet to physically be installed behind it and still give us the clearance we need for the printer itself.
This means that we had to install the outlet on the other side, the left side of the wall and then create two grommets into a shelf that routed the cable below the shelf and into the other side.
This also allowed The wire management for the printer to occur below the shelf rather than on usable shelf surface.
This allows the client to store additional things here and also keeps a very clean and neat appearance rather than the wire management spraying out all over the place.
Finally, we left a significant gap on the right side of the printer on the far side away both for ventilation and also for the termination cable management to Play with the shelf sliding in and out.
In this location, the cables stack and bend fold onto each other, but also stack in a very neat way that’s not visible and also leaves a very clean appearance for the printer.
Finally, we have to buy special outlets for the printer itself and this was also a major point consideration for both the printer dimensions and the design of the cable management within.
You only had 15 inches of clearance front to back and that means an additional inch has to be maintained on the very backside for the printer itself so that it slides forward and also with the cabinet and close fully.
Just allowed a couple of inches for the paper to come out of the printer on top, and also about 3/4 of an inch behind the printer for the cable to actually connect into the printers itself.
Finally to maximize space, we study the outlets and the angles of the outlets of the printer, after purchasing the spec and bought adapters with 90° angles for the cable wire management, so that it could Sufficiently take advantage of the maximum amount of space we had allocated to it.
Final Thoughts
In the end it was a very long complicated arduous process that involved two different printer specifications and at least three different shop drawing reviews and multiple coordination with the contractor, AV team, the project management team, the owner and the architect and the millworker in other words, six different parties, and almost $5000 Spent, to create a printer inside this cabinet.
And that is the challenge of installing a printer in a high and residential environment.
I hope this article was useful for you, and if you have any questions, please feel free to leave comments


Leave a Reply